Wildlife / Safari Photography
Equipment: Cameras, Lenses, Purchases, Filters, Camera Support, Image Stabilization, Batteries, Flash, Binoculars.
Other: Digital Storage, Digital ISO, Field of View Crop, Video.
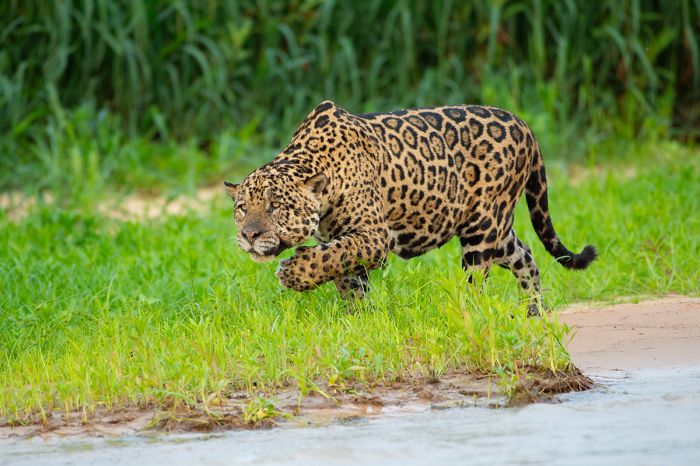
A jaguar patrols a riverbank in Brazil's Pantanal in search of caiman (Copyright © James Weis).
The advent of digital photography has resulted in many more amateur photographers than ever before and today anyone with a smart phone has a camera with them nearly everywhere they go almost all the time. That said, most people are aware that a camera phone or an inexpensive point-and-shoot is not going to give them the quality images they are hoping to get on a nature or wildlife-based travel adventure.
The camera market is flooded with an abundance of models, some with removable lenses, some with built-in zoom lenses, some big and heavy, some easy to carry and light-weight, some uber-expensive and some very affordable, but which one should you choose? The question really is which camera will be best for your trip and hopefully also be something you reach for often after you get home or at least on future trips.
Below are a few things to consider when choosing which photographic equipment to bring on your trip and we hope this page will assist you in making decisions about new purchases.
EQUIPMENT
I strongly encourage anyone interested in taking quality wildlife or landscape images on a wildlife or nature travel adventure to invest in a digital SLR (single lens reflex) camera. I do not recommend point-and-shoot cameras or mobile phones as a primary camera for a photo adventure. However, having a small, less expensive camera (even a mobile phone) in your pocket throughout any type of travel, is a good idea for those times when carrying your SLR is not practical. Moreover, many of the new “all-in-one” (ie, no removable lens) digital cameras have ever-improving zoom lenses and sensors allowing these cameras to capture superb images.
My next suggestion may be impractical for most, but here it is anyway: bring two cameras. If you have any backup camera, it provides insurance against something tragic happening to your primary camera. The optimal situation is to have two good cameras - put a lens on each and use them both!.
Here is an approximation of the percentage of images I have made with various focal lengths over the past ten to fifteen years:
14-200mm: 35%
200-300mm: 25%
300-400mm: 25%
over 400mm: 15%
Keep in mind that I travel with quite a bit of heavy camera equipment and I am also a very keen “birder”. This said, for most travelers, having big, expensive, “pro” lenses is definitely not necessary to get most images. I often travel with a large and somewhat heavy lens, mainly for birds, but I capture most of my wildlife images using my two or three favorite zoom lenses.
If you can get one, I suggest having a zoom that will provide up to 400mm of focal length with auto-focus capability. This will allow you to take advantage of virtually every photo opportunity on most wildlife-based trips. A 300mm lens will also suffice, but 400mm is better. At the wide range of a zoom, getting down to an effective focal length of 17-24mm will be very useful for landscape images or images with subject matter in close proximity.
Be sure to read the sections on: 1) image stabilization lenses; 2) image magnification and Field of View Crop.
One recommendation we make is that you spend your money first on a good lens and secondly on a camera. It’s slightly more important to have a quality lens than it is to have a quality camera. Cameras are really just a box that captures light. Of course, today’s cameras include software, different sizes and quality sensors, autofocus and metering systems, and other technology built in, but in the end, it’s really just a light-capturing box.
Lenses, on the other hand, vary significantly in quality based on the optics. The term optics describes the glass, which may be many different elements or lenses inside, all working together. The quality of a lens’ optics will vary depending upon the manufacturing process, the coatings used on the glass, etc. The point is that the quality of your images will be more affected by using “poor glass” (cheap lenses) than by using an inexpensive camera. In other words, if you put a $1500 lens on a $300 camera, you’ll likely get images of significantly superior quality to images taken with a $1500 camera and a $300 lens.
Furthermore, the pace of new camera introduction is far quicker than it is for new lenses. To illustrate this point, I used the same 300mm f/2.8 lens with 4 different cameras during a 10-year span on wildlife travel. Also, the quality of the digital sensors used today is so good, that using a high-quality lens is even more important than it ever was with a film camera. This is because lens aberrations are much more likely to be picked up by these sensitive digital sensors than by film emulsion, which was more “forgiving” in this sense.
Make sure you have screw-on filters attached to all of your lenses. You should use a daylight filter only, which blocks out UV light without changing the color of your images. In the “old days” (before digital), I used warming filters on my lenses, but today I shoot in “Raw mode” and leave my white balance setting on “Auto” almost all the time and then make any needed corrections to an image’s white balance using Camera Raw software. I recommend the UV or clear filter as protection for your lenses only. A scratch on the filter is relatively inexpensive compared to a scratch on your lens! Use filters!
I have taken many thousands of images on my travels and my techniques for getting the best shots have changed slightly over the years. However, my main goal (and struggle) has always been the same - to find the most effective way of taking sharp, well exposed images. The main problem you will often face when shooting wildlife is finding the best way to steady your camera. The problem becomes more pronounced when using longer focal-length lenses.
I have used all conceivable techniques (I believe), including home-made mounts, tripods, ball heads, gimbals, and bean bags - all in an attempt to provide a steady platform from which to shoot and this is especially difficult when shooting from a vehicle. Today, I use a good beanbag in most situations and this has proved to be the most flexible and effective stabilizer for me. A beanbag also allows me to quickly pick up and switch to fully hand-held methodology if my subject matter changes position quickly. If you have your camera tethered to a locking device such as a tripod, monopod, or gimbal, then you may miss shots while disconnecting your camera from it.
I encourage you to bring a beanbag and it can either be transported empty - you can fill it with sand when you arrive at your destination - or transport it filled with buckwheat - very lightweight.
If you’re considering purchasing a new lens, I would strongly advise you to consider one which offers image stabilization. There are numerous lenses covering a wide range of focal lengths available today which utilize image stabilization and they really do improve the quality of images.
The rule of thumb when hand-holding a camera (at least before the invention of image stabilization technology) is to use a shutter speed that is at least as fast as one over the focal length of the lens. For example, if you are trying to hand hold a camera with a 200mm lens, you will need to have the shutter speed set for 1/200 or faster in order to maintain sharp focus. Of course this assumes also that your subject matter is stationary.
Using an image-stabilized lens (Nikon calls their version Vibration Reduction) permits safe hand-holding (ie, no tripod or other support needed) at two full f/stops (Nikon claims three) slower shutter speeds than would otherwise be possible. What this really means is that some images which would otherwise turn out blurred or slightly out of focus can often be captured in perfect focus using these lenses. Two recommendations for an IS/VR lens on an African safari are the Nikon AF-S NIKKOR 80-400mm f/4.5-5.6G ED VR and the Canon EF 100-400mm f/4.5-5.6L IS II USM. Neither is inexpensive, but both offer a wide range of focal length and are great if you want to bring just one lens.
Very important -- Do not miss those to-die-for images because your batteries have gone dead. I use rechargeable battery packs with my cameras and rechargeable AA’s with my flashes.
First things first, the electrical voltage in many countries is 220V (versus 110V in the US). Make sure your battery charger accepts the correct voltage (today most are rated for 100V-240V) or you will irreparably damage your charger. Many places you will visit do sell batteries, but DON’T count on it - bring your own. Use rechargeable’s and bring several sets so you can swap them when they run out. I suggest two sets for each camera. Most camps and hotels have electrical plug points either in the guest rooms or in the office - check with us to be sure for your itinerary. You always want to have a charged set PLUS a backup set for each game drive.
FLASH
If you have a camera which accepts an off camera flash, you might want it for fill flash in some cases to add catch-light to an animal’s eyes or for evening and night drives. I am not a big practitioner of using flash for wildlife images. Making an aesthetically pleasing flash image of a wild animal is not easy. Use the flash if your camera has one, but use it primarily for fill flash, especially for people in shadow and close objects set against a bright background. Use of a flash for anything other than very close subject matter is usually futile - it won’t work well. You’ll want a fresnel lens flash-extender for your flash if you want to throw the light any distance at all.
One more note on flashes - If you’re serious about using a removable flash, consider purchasing a flash cord (I have one that stretches to about 3 feet) so that you can avoid having the flash point directly in line with the lens. Holding the flash at an angle to the animal’s eyes (different than the angle of your camera lens), especially in low light where reflections from their eyes will be more pronounced, will help reduce noticeable reflections.
BINOCULARS
Bring them! These are, in my mind, mandatory. Believe me — you will use them. Every person should really have their own pair, but at a minimum, have a pair between you and your traveling companion if you have one. A small pair will suffice. I use a pair of Leica 10x25’s and they are great. They are also relatively small.
What do these numbers mean?
Binocular size is expressed by two numbers, for example 8x42. The first number is the magnification (or power); the second is the aperture, which refers to the diameter of the objective lens in milli-meters. Therefore, 8x42 binoculars provide 8x magnification and have a 42mm objective lens. Remember that when it comes to binoculars, bigger isn’t always better. The higher the magnification, the heavier the binoculars are and the more hand movement and the shakier the image will be — just like with large camera lenses, smaller binoculars are easier to hand hold effectively.
How much magnification and aperture do you need?
When you increase binocular magnification you decrease brightness and field of view. I find that the 10x pair I have are more than sufficient for most travel. The same rules apply here as with camera lenses in that carrying a large pair and holding them steady is not so easy — I find that a compact pair with good optics makes more sense than spending for and lugging a larger pair with added magnification (unless you are on a birding trip). As for field of view, the greater the aperture, the brighter the image will be, but also the greater the size, weight and cost. Again, the smaller compact size of the 25mm pair provide plenty of view for my taste.
What is the difference between porro-prism and roof prism binoculars?
Porro-prisms have objective lenses that are spaced farther apart than the eyepieces. Porro-prisms are bulky but usually perform better and cost less than roof-prisms. Also, porros yield a better three-dimensional image. Roof-prisms dominate the consumer market. The objective lenses line up directly with the eyepieces, resulting in a streamlined, compact and lightweight binocular. But roof-prisms usually cost more and lose more light to reflection, which is a disadvantage for astronomers but not for daytime terrestrial viewing.
What about coatings?
Coatings reduce the amount of light reflecting off of the lens and allow more light to reach your eyes. Without coatings, up to 50% of the light entering the binoculars is lost to reflections from the many glass surfaces within.
A note on how they work
A binocular combines an image seen by both eyes into a single image. Binoculars are basically two telescopes mounted side by side. At the front of each telescope is a lens. Each lens gathers light from the image you’re observing. The objective or lens magnifies the image upside-down. If you’re using the most popular type of binoculars, prism binoculars, a prism in each tube turns the image right-side-up again. With field binoculars, a second lens in the tube functions essentially the same way as a prism, and inverts the image so it appears right-side-up. The light then travels down the tube and into each eyepiece and you see the image.
DIGITAL STORAGE
Digital images are initially stored onto removable digital flash media in your camera. For most cameras, this media is in the form of CompactFlash (CF) or Secure Digital (SD) memory cards.
How much digital storage to bring depends on several factors.
1. How many digital images you will make.
2. The size of the digital images (ie, how much storage space each image takes). This is determined by your camera settings (ie, JPEG Fine, JPEG medium, Raw, etc.)
3. Whether you will edit images (ie, delete shots you don't want) during your trip.
How Many Memory Cards Will You Need?
Memory cards come is varying sizes (note that the physical size of the card is generally the same, but the digital storage size differs). CF cards are available in several denominations by Gigabyte (GB) of storage space (1 Gigabyte = 1,000 Megabytes). If your images are 12MB in size each and you use a 64GB CF card, then you will be able to take and store approximately 5,333 images (64,000 ÷ 12) on one 64GB CF card. At this point, the card is full and you’ll have to remove your memory card from your camera and put in an unused card before you can continue taking pictures (note that some cameras also have limited built-in storage).
If you plan to make more images than will fit on the sum total of all your memory card space, then you’ll need to bring along additional storage in the form of a laptop, external hard drive(s), or specialized digital storage device.
Additional Digital Storage
Bringing additional storage devices allows you to upload your digital images from the memory card to the storage device. Once the images are safely stored onto the storage device, the memory card can be re-formatted (erased) and subsequently re-used in your camera to store more images. This process is then repeated each time the memory card is full. In this way, your memory cards may be used more than once during your trip.
Commonly used digital storage devices to consider (Each of the following storage devices involves bringing extra weight on your trip, so it is up to you which to use, but the advantage is that it reduces the number of memory cards you may need to purchase):
1. Laptop Computer - The advantages of bringing a laptop are that you can edit your images on the laptop’s screen and upload images onto the laptop’s hard drive (or portable hard drive - see #2 below). The disadvantage is that a laptop adds significantly to the amount of gear you are bringing along. You will also likely need to purchase a memory Card Reader device to upload your images (Note that some laptops have built-in card readers). The card reader is plugged into your laptop and the memory card is inserted into the card reader. This allows you to copy images from the memory card to your laptop’s hard drive.
2. Portable Hard Drive - A portable hard drive is basically the same as the hard drive that exists inside a computer (usually 2.5-inch laptop-type hard drives are used for this portable variety), except that these drives are enclosed in a protective housing and have a power switch and data transfer ports (typically one of the USB variations) so you can connect them to a computer.
The main advantage of portable hard drives are that they are compact (usually about 5.5” x 3.5” x 1”) and can hold LOTS of images (2,000GB or more). The disadvantage is that you will require a computer in order to transfer images onto these drives. This is because they are simply hard drives; they do not have a card reader built in.
The fact that these drives require a computer to use them defeats their purpose for many, but if you are bringing a laptop, this will allow you to avoid filling up your laptop’s hard drive AND allow you to make backup copies of your images on two separate drives (highly recommended if at all possible in case one hard drive fails). This is the data storage option I use.
3. Portable Photo Storage Devices - To meet the demands of the growing digital photography travel market, a multitude of compact storage devices are available. In essence, this type of device is a portable hard drive with a built-in card reader. Some of the devices in this category include a viewing screen (usually 3 to 4 inches) so that you can use it to edit images. Keep in mind that images viewed on such a small screen may be difficult to edit critically. Other devices in this category include the built-in card reader, but not the viewing screen.
These "all-in-one" photo storage devices may be the perfect answer for those who want additional data storage without having to carry a laptop.
DIGITAL ISO
ISO stands for International Organization for Standardization and is a camera setting that controls how sensitive a digital camera's sensor is to light. Before the advent of digital photography, the rating was called "film speed", which us a measure of a photographic film's sensitivity to light,
In the era of digital photography, the advantage is that one can change ISO speeds at any time. The same basic principles apply as did with film, in that the slower ISO speeds generally produce images with less noise (artifacts or other aberrations in the image) at the expense of having to use slower shutter speeds (which may lead to unsharp images).
Regarding ISO on digital cameras
Generally speaking, as you increase the ISO, you’ll find that the image colors tend to lose a bit of their saturation (i.e., get “duller”) and contrast is lowered. At the extreme, it can result in the equivalent of a 2-bit or higher reduction in individual color values, which is easily seen in images. Note however that the top camera companies are using image sensors which are more and more accurate (less noise) at higher and higher ISO’s. For example, the top-end cameras from Nikon and Canon are to produce extremely accurate and low-noise images at ISO’s up to 2000 and above.
Here’s how ISO values are created
My long-used camera (the Nikon D4) uses a “native” ISO of 100 (it’s the lowest ISO setting on the camera). All ISO values above 100 are created by amplifying the image data coming into the Analog-to-Digital (ADC) converter. In other words, the sensor always works at the 100 sensitivity, but underexposed data values coming from the photosites (on the sensor) are boosted by an amplifier to produce higher ISO values. This means that minor differences in the light values received between the many photosites on the sensor get magnified and may become visible (creating “noise”).
Further explanation
Imagine taking a picture and let’s focus only on two adjacent photosites on your camera’s digital sensor. Next imagine that the tiny part of detail in your image that is captured by these two neighboring photosites is 195 light photons by the first and 200 photons by the other. This difference is insignificant when these are near-black or very dark values and end up getting interpolated by your camera’s software into, say, a pixel value of 12,12,12 (ie, Red, Green, Blue color values) versus 12,13,12. But if these values are being amplified several times and they now represent middle gray instead of black or very dark, the difference may be significant (ie, 125,125,125 versus 125,135,125). This later difference in the pixel colors will likely be noticeable.
My ISO suggestions (to optimize image quality)
1. Use lower rather than higher ISO settings whenever possible (ie, such that you are able to get sharp images based on the light and lens combination), but remember that lower ISO means slower shutter speed and this can lead to unsharp or blurry images, so practice in different lighting and with stationary and moving subjects to see what works.
2. Expose to the right (to the right refers to the right side of an image’s histogram). This means you should lean towards OVER-exposure without actually blowing out the important highlights completely (ie, making them go 100% white, with no edge detail at all) rather than under-exposure.
Here’s the reason why: There is more image data captured in the highlights than in the shadows and if you under-expose, you are losing information.
Digital camera sensors capture light in a linear fashion. Our eyes do not. A scene with twice the number of photons reaching the camera’s sensor appears twice as bright; with our human eyes, this scene appears brighter, but not nearly twice as bright. If it did, we’d experience sensory overload when we move from shade to bright sunlight. Thus, our eyes see light in a non-linear way... (note this is what a gamma curve is intended to do - model human vision).
Most DSLR’s capture images using 12 bits (some now 14 bits) to encode the capture, producing 4,096 levels (2 to the 12th power) of tonality (from all black to pure white) and effectively capture 6 stops (like a f-stop on your camera) of dynamic range. With linear capture, this means that one-half of those levels (2,048) are devoted to the brightest stop, half the remainder (1,024) to the next brightest stop, half the remainder (512) to the next brightest stop and so on. In this scenario, the darkest stop, in the extreme shadows, is represented by only 64 levels or shades of dark grey. Thus, if you underexpose (to avoid blowing out highlights) you are wasting at least some of the image detail that the camera can capture (as the most detailed info is in the brightest stop).
To further illustrate, if you underexpose by just one stop, you are essentially wasting 2,048 bits of data and capturing only 2,048 (instead of 4,096). You are stretching only 2,048 bits across the histogram instead of 4,096... Thus, less digital information is captured than would have been if you had used proper exposure and therefore image quality is decreased.
3. ISO 800 is actually quite close to 100 in quality; so don’t be afraid to use it. On my Nikon D4 camera, I use ISO 800 quite often just to make sure I have the extra shutter speed (to get tack-sharp images). On this camera, the slight increase in noise from 100 to 800 is very minor. Note that these numbers may be lower depending on your camera, but the way to judge is to take the same image using different ISO’s and find out where image quality starts to become noticeably degraded.
4. Use VERY HIGH ISO Only When You Really Need the Increased Shutter Speed, but expect a slight loss of color saturation and increased noise in large color blocks, such as skies. A properly exposed ISO 1600 image is far better than an underexposed image at ISO 400. Underexposure at very high ISO’s will definitely introduce substantial noise in the shadows that you would not find at lower ISO’s.
5. Using VERY HIGH ISO’s Will Likely Require Post-Processing Work to Eliminate the Noise. Although the newer pro-level cameras are achieving acceptable image quality at ISO 2000 and above, you may need to perform color correction, contrast adjustments, and noise reduction when using very high ISO’s.
IMAGE MAGNIFICATION / FIELD OF VIEW CROP
This topic may be a bit confusing, but important, especially if you are using a camera which does not have a “Full-frame sensor”.
Many of today’s digital SLR’s use an imaging chip (CCD or CMOS) that is about 40 percent smaller than a 35mm film frame (which measures 24x36mm). Nikon refers to its version of this smaller sensor as a DX sensor and I will use that terminology to represent all such smaller sensors in the following discussion.
The result of DX sensors being used in a digital SLR is a “field of view crop” or lens magnification factor of 1.3 to 1.6 (depending upon the camera) times the focal length of the lens being used. I will not attempt to explain the physics of the reasons behind why this is true, but suffice it to say that the smaller sensors use only the center 2/3 portion of the image created by the lens.
Therefore, the effective focal length of the lens increases by this lens magnification factor when used on a digital SLR with a DX sensor. As an example, if you use a 70-200mm lens on a DX digital body with a 1.5 crop factor, the lens will have a field of view of 105-300mm and a 300mm lens on that same camera effectively becomes a 450mm lens and so on. The effective aperture (maximum f/stop) remains the same. The effective extra magnification can be either good or bad (if you want wide angle shots, the additional focal length is undesirable), depending on your needs.
Most wildlife photographers will benefit from additional focal length, since good quality telephoto lenses are both expensive and heavy to transport and we all wish we had a bit more magnification to get closer to our wild subjects.
A few final comments
One less obvious benefit of all this is that since a digital sensor is capturing the center portion of the image, the image quality will (should) be better (all other things remaining equal) since camera lenses typically have better optical performance (sharpness and contrast) at their centers than at their outer edges.
For those photographers who would still like to be able to get those beautiful wide angle landscape or people shots, any additional focal length created by a DX sensor is not good. A 20mm ultra-wide lens becomes a not-so-wide 30mm lens. There are various ultra-wide zooms designed specifically for the smaller sensor cameras.
Finally, there are many cameras available (usually higher-end models) which offer a “full frame” digital sensor. These cameras have 24x36mm image sensors (the same size as a frame of 35mm film) without any field of view crop (focal length multiplier). Simply put, a 16-35mm lens on a “full-frame” digital SLR will provide a 16-35mm field of view.
VIDEO
A video of your travel experience is also a great way to keep the memories lasting and more and more people are capturing video. Like the world of still photography, video has gone digital as well and almost all cameras on the market today now offer a video mode. In fact, many of the advancements in newly announced digital cameras are in the video realm (ie, better autofocus and better image quality in video).
Here are some things to consider when it comes to video:
Video Using a Digital SLR (DSLR) Camera
Most DSLR cameras now offer video recording modes in high definition. High definition refers to any video system of higher resolution than standard definition (SD). Resolution is typically measured using the number of horizontal lines in the image. Cameras that offer HD video record in either 720p (720 lines of resolution) or 1080i (1080 lines of resolution). Each format delivers a 16:9 wide screen aspect ratio. There is some debate over which format is better, but either is better than SD. The “i” in 1080i refers to an interlaced format. Basically, each frame that you see in this format is split into two half-frames of 540 lines that flash an instant before the next 540 lines are seen. This is all done so quickly (usually at 1⁄60 of a second for each half-frame) that the human eye doesn’t recognize the two separate fields. The “p” in 720p refers to progressive frames. This is the opposite scenario, where every frame contains all the information at once. Overall, both formats deliver incredibly sharp detail and you will not be able to see any difference between the two.
Data Storage
Video can eat up your camera’s storage space quickly if you shoot a lot of it, so make sure to consider this when calculating your storage needs. The emergence of new DSLR cameras which incorporate HD video capability has resulted in stagnation of the old camcorder market.
Video-capable DSLR’s are not full replacements for high-end professional-quality camcorders (some of which now record in 4K or four times standard HD), but they do offer several features not available on a consumer-level camcorder and they are even being used to record some TV shows and Indie films.
Advantages of shooting video using a DSLR versus a Camcorder:
1) Your video camera is now built in to your still camera; this saves space in your camera bag and allows for quickly shooting a video clip without putting down your DSLR.
2) DSLR’s have larger sensors than all but the highest-end professional camcorders. What this means is better image quality (especially in low light and at higher ISO settings). The larger sensors also provide the ability to shoot video with a much shallower depth of field than a camcorder. This can be used to create a more cinematic look than video shot on a camcorder.
3) DSLR’s accept your entire range of lenses. Most consumer-level camcorders have a single zoom lens attached and it is not removable.
4) You can easily take a high-quality still image any time while shooting video with a DSLR merely by pressing the shutter button (albeit briefly disrupting the video recording).
Drawbacks of shooting video using a DSLR versus a Camcorder:
1) DSLR’s were designed as still cameras and aren’t as ergonomically suited to video shooting.
2) Camcorders offer smooth and silent power-zooming. This type of zoom action is nearly impossible to replicate on a DSLR (without external equipment).
3) Camcorders offer far better auto-focus capability during recording. This is a major downside of video recording on a DSLR. The mirror on a DSLR is locked in the up position during video recording and this means auto focus is only available via contrast-based AF (does not involve actual distance measurement at all and is generally slow). Manually focusing while trying to hold your DSLR and lens steady is not that easy. So essentially one has to lock focus on a subject and then start recording... Then if re-focus is needed (i.e. your subject has moved further away or closer to you), you have to stop recording, re-lock your focus and start recording again… not so good! Note however that contrast-based AF on DSLR’s is improving (mainly by offering image processors that permit faster contrast-based AF). Also the newer “mirrorless” Compact System Cameras offer full-time auto-fcous during video recording.
4) Sound recording on a DSLR is typically far inferior to that on a camcorder. The built-in microphone on a DSLR will often record sounds inside the camera (like the autofocus motor) and is sometimes located on the back side of the camera.
5) Camcorders offer built-in neutral density filters, which helps to obtain proper exposures shooting at wide apertures, even in bright sunlight.
All things considered, the video capabilities on today’s DSLR’s are very good and should continue to improve over the coming years. If you plan on using your DSLR to take video, I suggest you try using it before you travel, so you can get the most out of it while on your trip.
Equipment: Cameras, Lenses, Purchases, Filters, Camera Support, Image Stabilization, Batteries, Flash, Binoculars.
Other: Digital Storage, Digital ISO, Field of View Crop, Video.